Violin tuning can be a tricky business. For guitarists, the pegs are a less-finicky metal mechanism that will stay in tune with relative ease.
In comparison, violin pegs are more delicate and made of wood, which means that changes in temperature and humidity will affect how the pegs react, causing the strings to become out of tune.
It is a common experience to become frustrated with your violin in between lessons because it doesn’t sound quite right, but your teacher may have said, “Whatever you do, don’t turn the pegs!”
This an important instruction for young children, who should leave the tuning to older students, teachers, and adults.
Learning how to tune the violin for the first time takes patience and guidance.
In this guide, you will have the information and tools to understand how to tune a violin with a tuner and by ear, a few tricks to help, and the best violin tuners that can aid the process.
The Guide
Proper Setup
Where, in fact, do you start with tuning a violin?
The number one factor in keeping a violin in tune is proper equipment.
Unfortunately there are many very cheap instruments that have shoddy craftsmanship and improperly fitting pegs.
If the pegs do not fit in their holes in the pegbox, are either too tight or too loose, the strings will not have the correct tension to stay in place, which then greatly affects the ability to tune the instrument.

Buy or rent a violin from a trusted source, ask violin specialists and teachers for their recommendations.
This will save a lot of time and money to have a good quality instrument at the start.
It’s hard enough to learn to play the violin, but even harder without proper equipment.
Make sure your violin has been strung correctly, with quality strings, by a violin professional.
Note that guitarists string their instruments differently and oftentimes general music store employees will string a violin in the same way as a guitar.
Violin strings should be placed in the hole of the peg, then carefully and slowly wound over and around the peg, pushing in slightly while turning.
Violin Tuning Notes
The violin is tuned to these notes from low to high: G, D, A, and E.
When two strings are played together they make an interval called a “perfect fifth.” An interval is the distance or number of pitches between two notes.
A perfect fifth in simplest terms is the distance of five notes.
The label of “perfect” has to do with its pleasing sound and the frequency ratio of 3:2. More on the meaning of this interval can be read here.
Violin, viola, and cello are all tuned in fifths. Double bass is tuned in fourths.

String players always start by tuning their A. This has to do with standard orchestral practice.
In rehearsals and concerts, the oboist of the orchestra plays a long A for each section of the orchestra to tune.
The string players tune their A. Then the other strings are tuned by ear from the A, by playing them two at a time and adjusting as needed.
Beginners and Tuning
Here is a picture of the parts of the violin that are related to tuning:

The violin’s tuning parts are the pegs and fine tuners.
For beginning and intermediate students, a fine tuner should be attached to each string.
Advanced players and professional violinists have one for their E string only.
The pegs are used for larger changes of pitch and tension, while the fine tuners make small adjustments.
Beginners should become comfortable with using the fine tuners first, and then learn how to turn the pegs.
This is because too much turning or pushing the peg in can cause either the string to break, the peg to break, or both.
Fine tuners make small adjustments to the pitch with a turning screw.
Turn to the right, the pitch will become higher and the string tension tighter. Turn to the left, the pitch is lowered and tension loosened.
If needed, a complete guide to installing fine tuners can be found here.

Let’s Get Started
Enough about the ins and outs, time to get to the practical!
Just like anything, to become good at tuning will take some practice. It can take years to be able to tune well by ear.
A chromatic tuner that can both display the note you are playing and play a pitch for you is the best type to have from the start.
Tuning can also be done from a piano or a tuning fork, but at the start the tool that is most useful is to have something that can sustain the tuning note while you adjust.
There are so many varieties of tuners on the market it can be hard to wade through them all and decide which is best.
Below you’ll find some suggestions and reviews of tuners to try.
Start with tuning note A. Set the chromatic tuner to A=440hz and have it play the tone.
Sing or hum the note to yourself, listen to the tone again, then play on the violin.
Does it sound the same as the tuner? Can you tell if the violin note is higher or lower?
Go back and forth between listening, and playing the note on the violin.
Part of tuning is pitch awareness and being able to label a pitch as “sharp” or “flat” to the tuning note.
With the A sound firmly in your memory, now switch your tuner to “listening” mode and play to the device.
There is usually some kind of dial or needle that will point either to the left (flat), middle (in tune) or right (sharp) with a note name listed.
Some tuners also show a green light when your note is in tune and a red light when it is not.
The goal is to have the needle in the middle, a green light, with the A-440 showing!
If the tuner shows “A” but the needle is not in the middle, analyze and decide which way the fine tuner should be turned.
Remember that if the needle is to the left, the pitch is flat.
Turn to the right and play the note again. Repeat this process until you’ve reached the green light.
A silly saying can help, “lefty loosey, righty tighty” in turning the fine tuners and pegs. Left=lower and right=higher in pitch.
What if the note showing on the tuner is not A, and not even close?
It’s time to use the pegs to adjust the string.
Using the Pegs
As stated in the introduction, make sure you have your strings properly installed and decent-quality pegs for your violin.
Pegs are usually made from certain types of wood. If a violin is stored in extreme temperatures or humidity, this causes the pegs to swell and then they are very difficult to turn.
There is a solution called peg dope that can help with very stuck pegs, but should be used very sparingly and only in extreme cases.
Always tune from below and coming back up to the note.
This may mean loosening the peg first a little before turning and tuning back up to the correct pitch.
In order to have the peg stay in place, it must be gently turned while also pushing in. Merely turning will not keep it in place.
Here is a picture of how the different pitched strings are installed on the violin:

Tuning while Plucking
Place the bottom of the violin vertically on your lap with the strings facing you.
Turn your tuner again to the A and have it play the pitch.
Pluck the A string as much as needed, and decide if you need to lower the pitch or make it higher.
If the string needs to be a higher pitch, slowly turn the A peg away from you while pushing in a little bit at a time, slowly, while plucking the A string to hear the sound.
Make sure you are not making the string too tight and much higher than the A, as it can snap and break. (Hence the reason above for tuning from below the note.)
Repeat this process with each string, using your tuner on tone mode where it generates the pitch.
Once you feel you have tuned all the strings, switch the tuner to listening mode, and play each string again to double check.
Tuning in Playing Position
Once you have a feel for turning the peg and pushing in, it’s time to turn the pegs while the violin is on the shoulder in playing position.
This is a more advanced way to tune and the goal of how to tune most of the time unless your pegs become too stuck.
Switch the tuner on listening mode again so that you can watch the needle adjust while you move the peg and match the pitch.
Now you’ll use your bow to play.
Go to playing position, have the tuner play the A, then play your A and use your left hand to adjust the peg.
Always turn the peg down a little first, then turn the peg away from you while pushing in until the pitch matches the tuner.
Your left hand should partially hold the peg and also support the peg box, as shown in the picture.

Then, repeat with the three other strings with the tuner.
Turn the tuner to the appropriate note, listen, then play your note and try to match the pitch.
Tuning Violin by Ear
All professionals tune their violin by ear, as was stated earlier, by obtaining the tuning pitch from the oboist, or a tuning fork, or an A from a piano or tuner.
Once the A pitch is locked in, then the other strings are tuned by ear in twos.
This goes back to the discussion of the sound of a perfect fifth. Violinists come to know this sound very well from tuning.
Play the A with the D, in long and sustained tones.
Adjust the D with either the peg (or fine tuner) as needed while playing.
Then repeat the process for playing the D and G together, adjusting the G as needed.
Finally, the A and the E, tuning the E.
The best way to be confident with violin tuning is to have guidance from a teacher, try at home and when playing in ensembles, and eventually it will become easier.
Obtain a quality tuner or application and get started.
Top 5 Best Violin Tuner Reviews
Tuner Lite
The Tuner Lite by Plusadd is made for IOS devices.
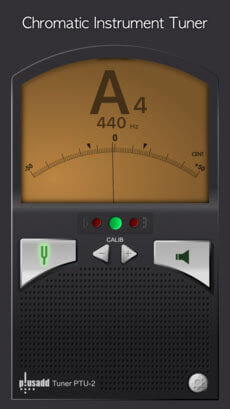
It has a basic needle display (as shown,) and can generate a pitch or give a reading of the pitch being played.
Simple yet an effective tuning tool.
- Simple to use
- Portable: for Iphone, Ipad, Ipod Touch
- Useful for any instrument
- Free
- Best violin tuner app for your Iphone
- Basic features only
- Only for iOS
- Pitch tone is not very loud
Musician's Kit App
As the name implies, The Musician’s Kit offers several features for the musician.

Not just a tuner, but also a metronome and recorder as well.
You can record and download to Itunes as well as send tracks by email.
- Free
- Several features in one
- Clear layout
- Iphone, Ipad, Ipod Touch
- Recent problems with iOS 9 update (now should be fixed)
- A few complaints that the metronome is not accurate
- iOS only
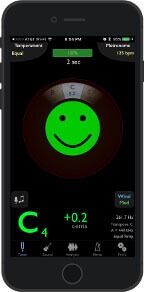
Tonal Energy
Tonal Energy is the ultimate in tuner applications. This app has anything you could think of, and probably more!
The tuner feature does not use the traditional needle approach. Instead, the idea is similar to a stoplight with red, yellow, and green.
The green smiley gets larger as you arrive on the desired in tune pitch.
Other features include a detailed metronome, orchestral strings and guitar tuning page, piano keyboard, pitch analysis, and plenty of recording options.
Another important feature to is that you can sustain more than one note, for example a chord, not just one note.
You can choose from a wide variety of instrument sounds, and also change transpositions. Other basic tuners do not offer this feature.
- iOS, Android, Amazon
- Wide array of features
- Larger pitch range than other tuners
- Pitch analysis
- Transposition feature
- Sustain more than 1 note at a time
- Best violin tuner for android
- Many features are for more advanced players
- Can be overwhelming, too many features at once
Snark Clip-on Tuner
The Snark family of clip-on tuners are made for guitars, with the listing stating that violins can use them as well.

Clip-on tuners are not very common for bowed string players. While it seems like a good idea, it becomes more cumbersome to clip it on, pick up the bow, play, and then the pegs are in the way of the clip.
- Inexpensive
- Small, can easily fit in a case
- Simple screen to read
- Best clip on tuner for violin
- Cumbersome to use for a bowed string instrument
- Does not generate a tone
- Very basic
Korg CA-50 Tuner
Korg brand tuners are the traditional brand in tuners, especially for orchestral instrumentalists.

For the traditionalist who wants a proper tuner, this is the one to purchase.
It has basic features and a standard design.
- Well-known brand
- Easy to use
- Compact
- Uncomplicated display
- Simple features if you want more than just a tuner
Conclusion
With the guide and several tuners to take a look at, there are many points to digest and contemplate.
Remember that tuning your violin properly will definitely take time, patience, and perseverance, but it is possible to steadily improve and be able to tune your violin with ease.